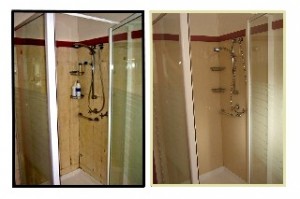
The bathroom looks old and tired and it needs sprucing up but your budget is restricted and you don’t know where to start. Sounds familiar? Here are some DIY tips for bathroom renovations that are simple and won’t break the bank.

Before you jump in feet first, stop and think about your project and start with some bathroom design ideas.
- The Wish List
This first step is the most important and often overlooked that can lead to regret and “if only…”
- Make up a list of each and every detail of your ideal bathroom including fixtures, fittings, linen, etc.
- Identify each item as:
– Must have
– Could make do without
– For the bucket list
- Colour schemes
Here is where you can apply some creativity.
- Decide on the main colour for the bathroom. Keep in mind that light neutral colours such as off white and cream will give an illusion of space which is particularly important for small bathrooms.
- Browse through colour charts to pick one or two contrast colours. The number of colours that can be used will depend on the size of the bathroom and materials to be used. Dulux paint, mixed to suit your personal taste, is used for our OzzieSplash Acrylic Splashback
- Your Budget
When looking at tradesmen and suppliers of material for your bathroom, keep in mind that cheaper is not necessarily better. Ask for references, look at previous work and, if possible, talk to people who have used the services/products that you are interested in. Here are some money saving tips.
- Try to stick to the existing layout as much as possible to avoid having to relocate plumbing or electrical outlets. Some Council regulations will insist that plumbing and electrical jobs must be done by licences tradesmen but, even if this is not the case where you live, keep in mind that subsequent repairs to waterproofing etc can become extremely costly.
- The things that you can do yourself such as replacing a vanity would be the first thing to come to mind but you can also make great savings by covering the walls with OzzieSplash Acrylic splashback. It’s perfect material for a DIY job. Sheets cut to size to your specifications can be supplied in almost any colour of your choice, it’s very affordable and as a major bonus cleaning is super simple because there is no mouldy grout to worry about.
- Your local tip or op-shop can be a great money saver. Check them out for old mirrors and any other items that can be restored to add that extra personal touch to your bathroom renovation.
- Last but not least, make sure you spend your money wisely. Use your wish list to make sure that you have the essentials but, if possible, try to include at least one item from your bucket list. One little luxury can give you a tremendous feeling of satisfaction when the DIY bathroom makeover is finished.
Before you begin work on the project remember to make sure that all fixtures and fittings that are required for the DIY part of the job will be available when you’ll need them. And also keep in mind that bathroom renovations can create a lot of dust and dirt so block the doorways to all other rooms with plastic sheets or some other form of dust cover. For more information on DIY installation and costing of OzzieSplash Acrylic splashbacks go to our DIY page.
Did you find this information helpful? Leave a comment here to let us know.


Sorry, comments are closed for this post.